
You already have a working frontend with HTML, CSS, JavaScript and images. How do you bring it into WordPress without rebuilding the design? You have several practical options: paste page code into WordPress's Custom HTML block, host the files in a separate directory, turn the design into a WordPress theme, or deploy a compatible frontend package as managed WordPress pages. The right method depends on whether you need native WordPress editing, the original design, or a repeatable way to manage updates.
Start with the files you actually have
Before choosing a method, open the original site in a browser and check its folder. A typical small frontend might look like this:
studio-site/
  index.html
  styles.css
  script.js
  images/
    hero.jpg
    logo.png
    project-01.jpg
Look for references such as <img src="images/hero.jpg">, url("images/hero.jpg") inside CSS, and <script src="script.js"></script>. Those paths were written for the original file layout. They will not necessarily point to the right files when you paste only the HTML into a WordPress page.
If you have React or another framework's source project, first determine whether you also have a finished browser-ready build. Files requiring a build server, custom backend, database or server-side rendering are a different deployment task from plain HTML/CSS/JS.
Option 1: Add the page with WordPress's Custom HTML block
For a small page, start with WordPress's built-in editor. In WordPress 7.0, the Custom HTML block includes separate HTML, CSS and JavaScript panels for users with the appropriate unfiltered_html permission. You do not need another plugin just to run a modest amount of frontend code. WordPress's Custom HTML block documentation explains the editor and permission requirements.
- Go to Pages → Add New, give the page a title, and insert a Custom HTML block.
- Select Edit HTML. Paste the page's body content, not a second full HTML document with its own
<html>,<head>and<body>tags. - Paste the styles into the CSS panel and the browser-side interactions into JavaScript, if those panels appear for your account.
- Upload the site's local images through Media → Add New Media File.
- Replace local image and background paths in the HTML/CSS with reachable URLs. Save the page as a draft and preview it at desktop and phone widths.
The image step is easy to miss. Suppose your original page contains:
<img src="images/hero.jpg" alt="Studio project">
After you upload hero.jpg to your site's Media Library, its URL might look like:
<img src="https://example.com/wp-content/uploads/2026/10/hero.jpg" alt="Studio project">
The same principle applies to CSS such as background-image: url("images/hero.jpg"). The block's HTML, CSS and JavaScript tabs do not automatically import an entire image folder and rewrite its references. A different asset-management method can avoid manual relinking, and images already hosted at stable public URLs may work without any changes.
What can still change? The site's WordPress theme may add its own content width, padding, header, footer or CSS rules. A pasted frontend often needs CSS scoping or template adjustments, even when the code itself is valid. The editor is a sensible choice when the page is small and you don't mind maintaining its code and assets yourself.
Option 2: Upload the original files to a separate hosting folder
If you just want to serve your static HTML website alongside WordPress, your host's file manager or SFTP may be enough. Create a separate folder in the appropriate web directory, upload the HTML, CSS, JavaScript and images together, preserve the folder structure, and confirm that index.html and its relative asset paths load in the browser.
This can keep the original file references intact, but the resulting page isn't automatically a normal WordPress Page. It may not inherit WordPress navigation, page editing, revisions or sitemap entries. Avoid creating a directory that conflicts with an existing WordPress URL, and make a backup before changing hosting files.
Option 3: Turn the frontend into a WordPress theme or template
Choose this when editors need to change the site's content through WordPress blocks or templates, or when its navigation and layout should integrate deeply with the theme. A developer typically separates shared headers and page layouts, maps content into WordPress, and loads styles/scripts using the platform's asset APIs. The WordPress Theme Handbook covers the standard CSS, JavaScript, image and font approach.
This offers more native control, but it is a development project rather than a simple file upload. If your main goal is to retain a finished visual design without rebuilding it, a managed frontend deployment can be a better fit.
Option 4: Upload a compatible website package with WP SiteDelivery
WP SiteDelivery is intended for a different task: taking an already-finished, compatible browser frontend and deploying it as WordPress pages, with a reviewable path for later changes. It does not create the website for you or turn its markup into editable Gutenberg blocks.
- Finish the design and gather the HTML, CSS, JavaScript and local assets.
- Prepare a compatible WP SiteDelivery ZIP using its Conversion Instructions or the separate Converter when the finished export is supported.
- Upload the ZIP in WordPress and review the proposed pages, assets, destinations and any warnings.
- Preview the result, then approve deployment as a draft or published page as appropriate.
- For supported later updates, use the managed update, backup and restore workflow instead of manually replacing numerous code snippets.
Local images can travel inside the ZIP and be resolved from the package references. You don't have to upload each one into the WordPress Media Library and paste seven replacement URLs as you would in the simple Custom HTML workflow. A finished static/browser-ready frontend is the target; a project that needs a custom server, database or server-side authentication isn't automatically supported.
Our hands-on example: one page and seven image files
We created Morrow Studio, a fictional portfolio built specifically to inspect how a complete frontend moves to WordPress. It has one HTML page, a stylesheet, JavaScript for a details panel and palette switch, and seven local images: a PNG logo, a CSS background JPG and five portfolio JPGs. Six images are referenced directly in HTML; the seventh is used by CSS.
We prepared the same page in two forms: a WordPress Custom HTML version and a WP SiteDelivery ZIP. Here is what we observed during an October 2026 hands-on check:
- WP SiteDelivery: the ZIP was uploaded and a WordPress draft was created. The site owner previewed it in the WP SiteDelivery dashboard and reported that the layout, images and interactions appeared to work. The desktop and mobile images below are authentic captures of that draft preview.
- Ordinary WordPress: the owner created a page with a Custom HTML block, confirmed that the HTML, CSS and JavaScript tabs were present, and uploaded all seven images to the Media Library. We stopped before updating the image URLs or rendering the full page through the block editor.
That means this example demonstrates a working WP SiteDelivery draft preview and the beginning of the manual asset workflow. It is not a completed side-by-side design-fidelity or stopwatch comparison. A simple WordPress block may produce the same appearance after its assets and styles are connected correctly.
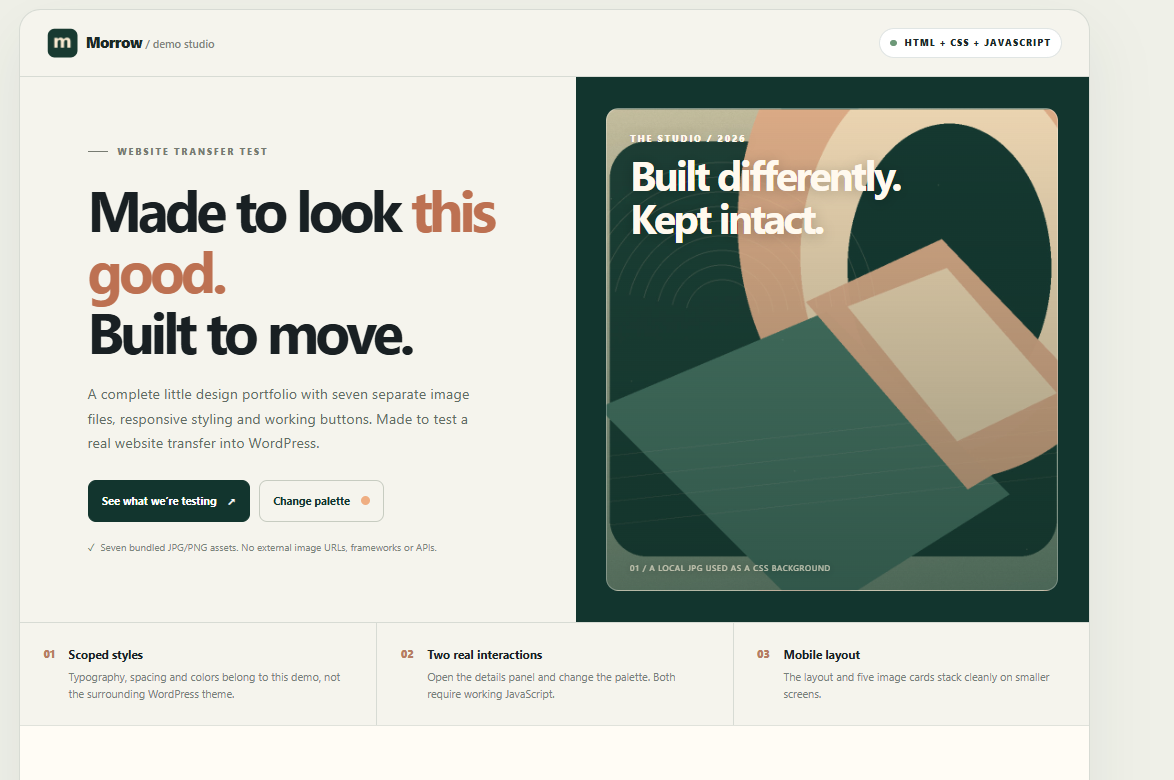
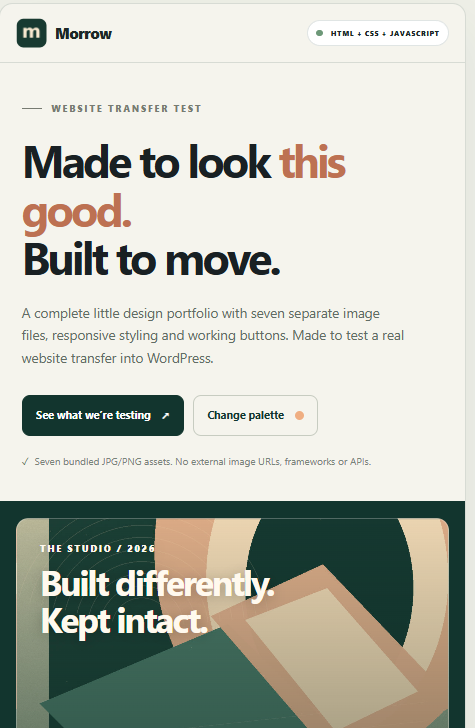
The important distinction is the work involved before and after the screenshot. One-page sites with a few images can be straightforward in the standard WordPress editor. With several pages, shared files and repeated updates, keeping a single compatible package and a managed revision workflow becomes more useful.
Which publishing method should you choose?
| If your priority is… | Start with… | Understand the tradeoff |
|---|---|---|
| Adding a custom-designed section to one page | WordPress Custom HTML block | You manage any asset URLs and theme conflicts |
| Serving untouched static files on your domain | Web hosting folder / SFTP | The page may sit outside WordPress's content management |
| Editing site content as native WordPress blocks | Custom theme or template development | Requires rebuilding how the frontend integrates with WordPress |
| Deploying a finished compatible frontend and managing revisions | WP SiteDelivery | Requires a compatible package; output isn't editable as native blocks |
If the design looks broken after publishing
Images are missing. Inspect the final image URLs, including url(...) in CSS. An images/ path from your laptop is not a WordPress Media Library address.
Margins, fonts or colours have changed. Check the active theme's content container, default styles and overlapping CSS selectors. Try a full-width template when one exists, or scope the frontend styles to its own wrapper.
Buttons do nothing. Check that JavaScript actually loads, selectors still match the inserted HTML, and your user permissions allow the code. Do not disable WordPress security controls just to make an unsafe script run.
Navigation or URLs change. Make sure every menu link points to the page WordPress actually serves. For updates, preserve existing page paths and check the target before applying changes.
Verify the page before you publish
Open the real draft on a desktop and a phone. Check the images, interactive controls, navigation, page title and URL. Then inspect SEO details: one meaningful H1, a unique title and description, suitable image alt text, crawlable text, the intended canonical URL and indexing settings. Make sure the page is linked from an appropriate navigation or guide page and that its assets use HTTPS. If it's a managed page, test a safe update and understand the restore option before making important live changes.
If you're still deciding whether to rebuild the whole site instead, read our guide to moving an AI-built website into WordPress.
Want to preserve a finished frontend rather than recreate it block by block? See how WP SiteDelivery handles compatible packages, previews and managed updates.